Managing and Cloning Projects
We have built a custom feature to make adding new projects to your portfolio as simple as possible. Instead of building a new project layout from scratch every time, you can clone an existing project and simply swap out the text and images.
Step 1: Clone an Existing Project
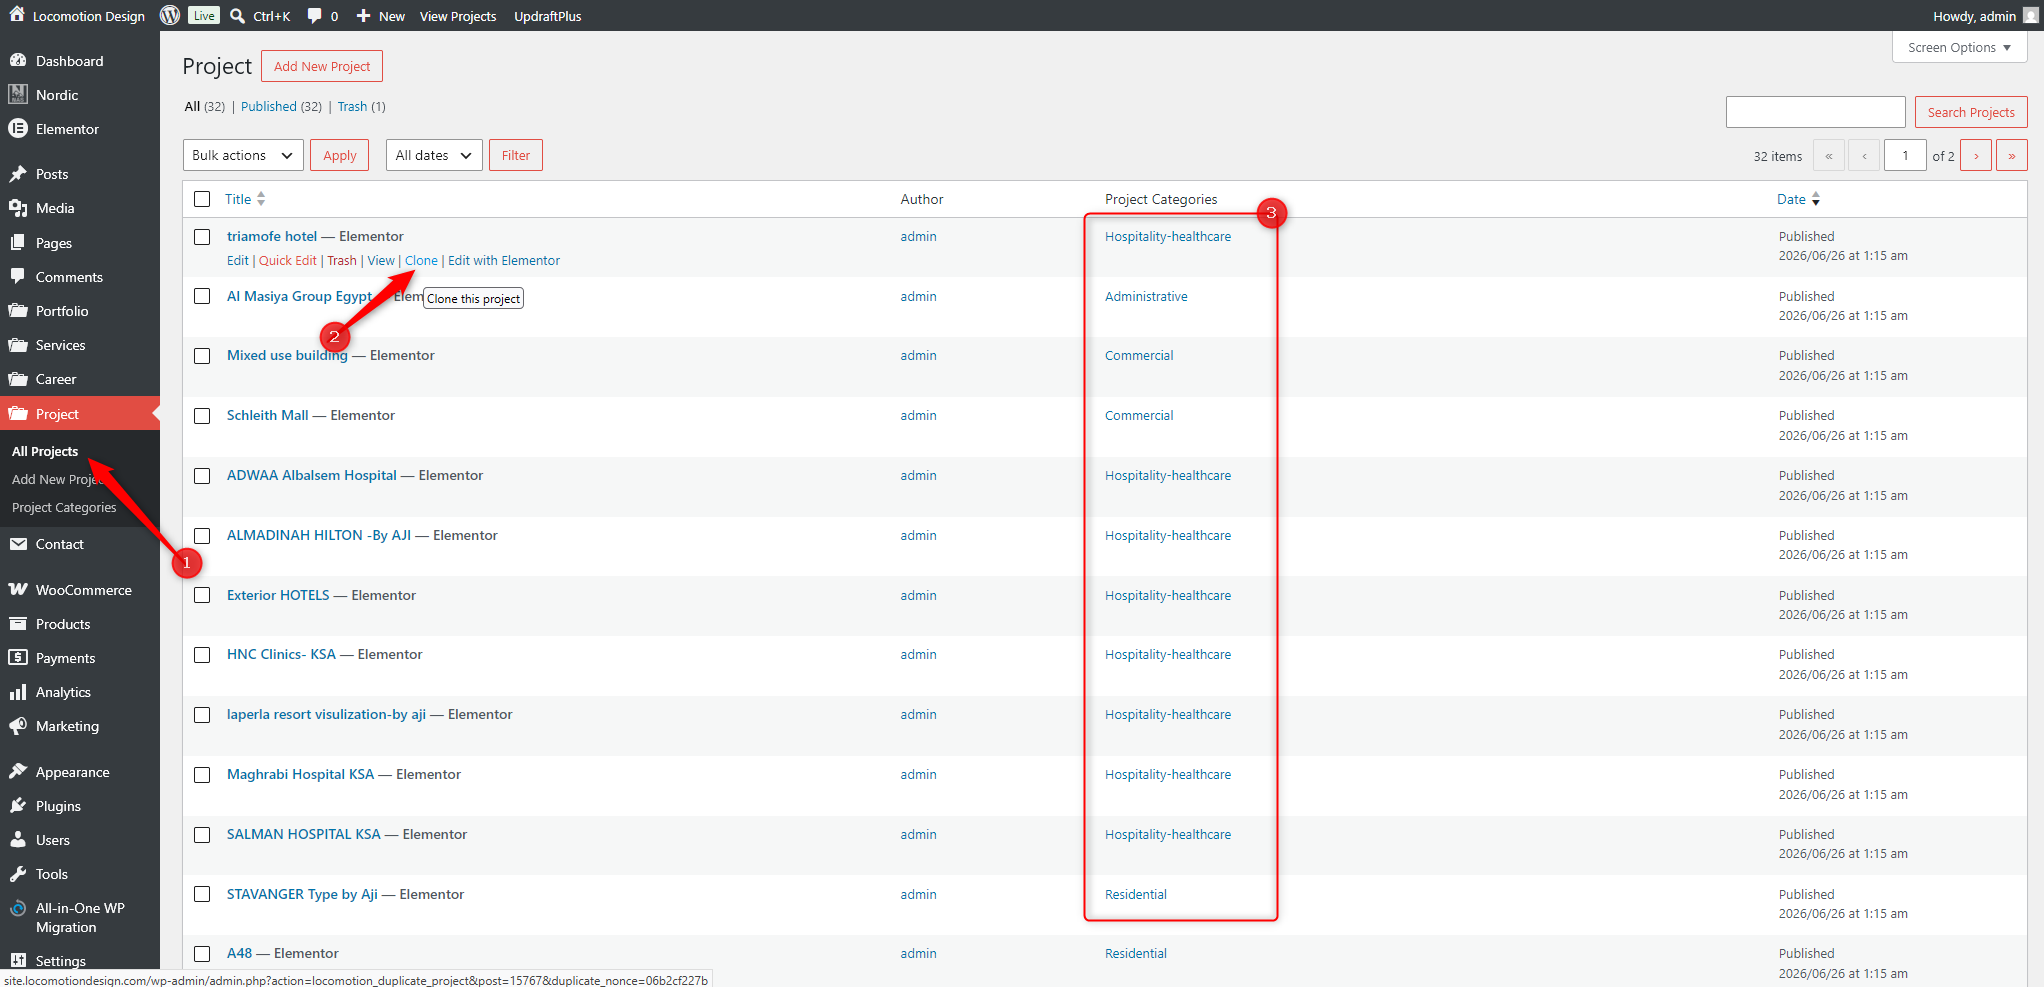
- Go to All Projects: Navigate to the Projects menu on the left sidebar and click All Projects.
- Clone the Project: Find a project that has the layout you want to reuse. Hover over the project name and click the Clone link. A new draft project will be created automatically.
- Check Categories: Use the Project Categories column to help you find an existing project in the same category you want to create (e.g., Hospitality-healthcare, Commercial, Residential).
Step 2: Edit Project Settings & Gallery
Once you click Edit on the newly cloned draft, follow these numbered steps to update your project:
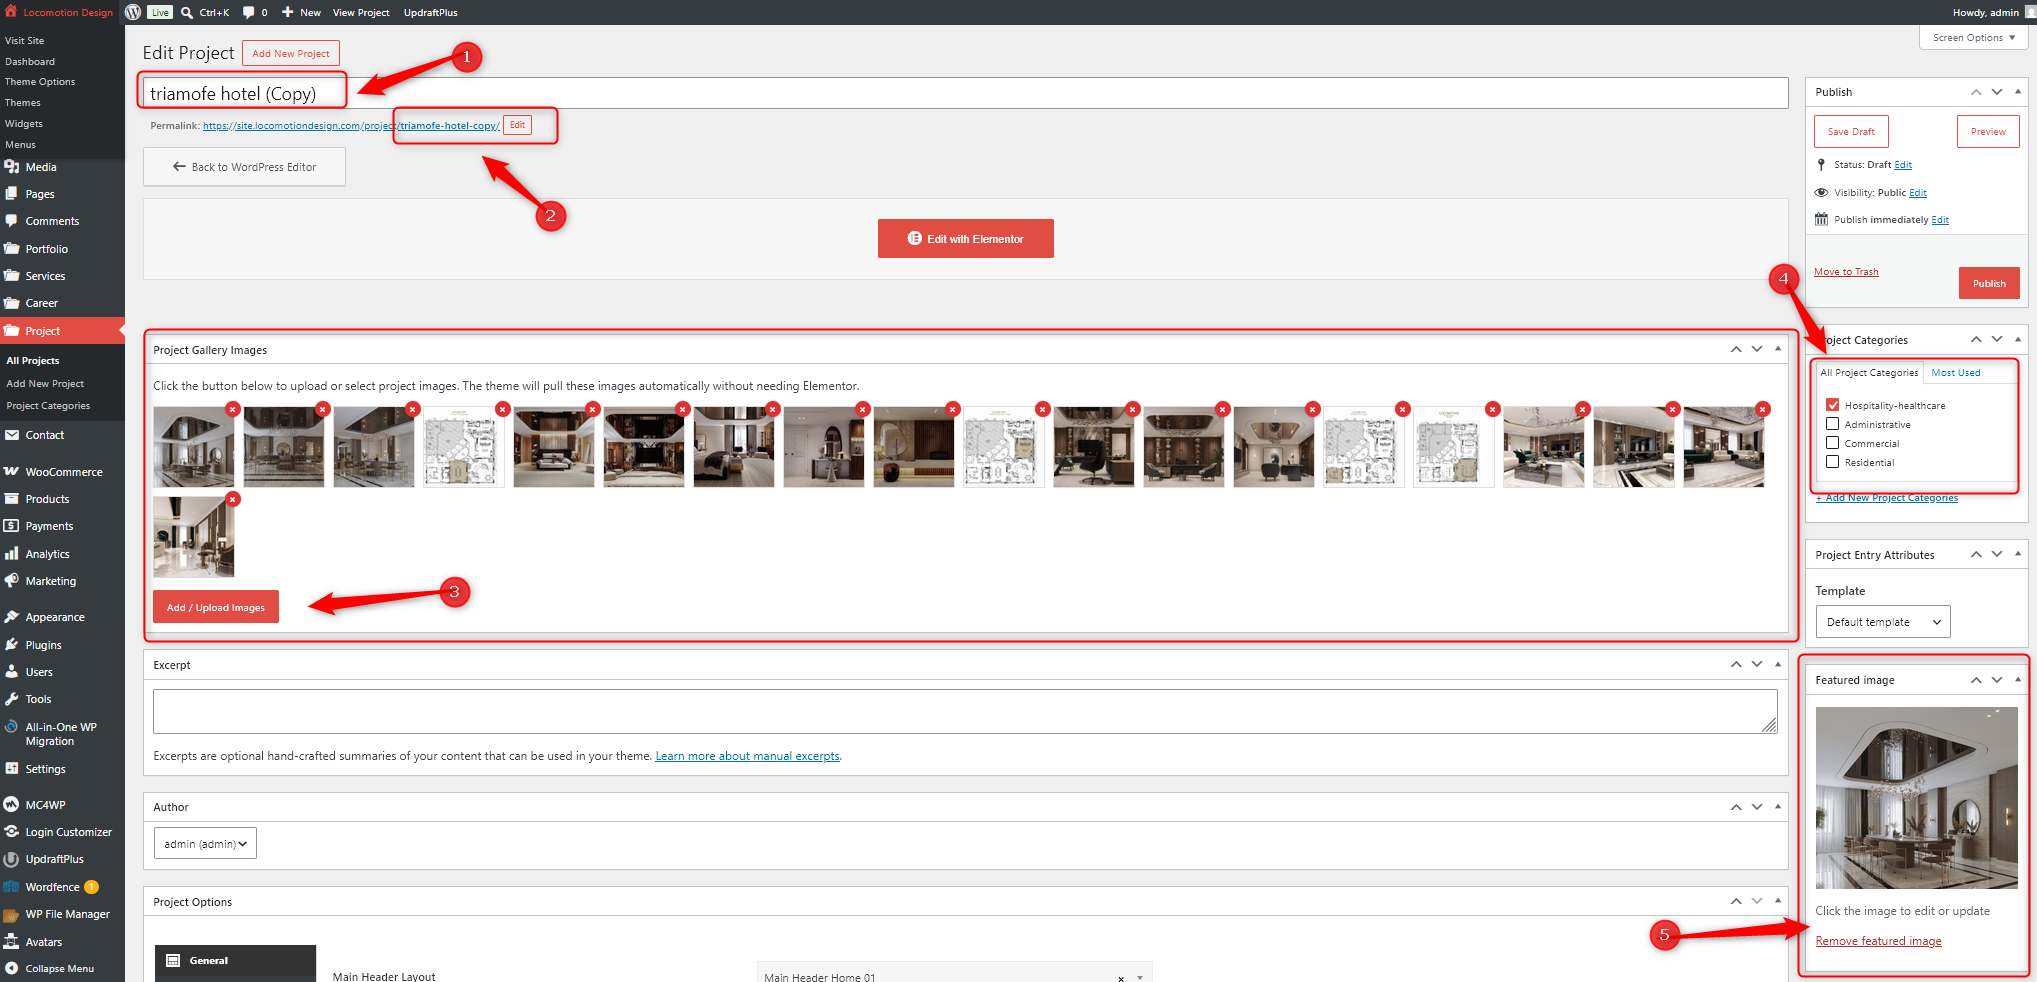
- Update the Title: Change the project title at the very top.
- Update the Link (Permalink): Click the "Edit" button next to the permalink to change the URL slug to match your new title (e.g.,
new-hotel-project). - Update the Project Gallery: Scroll to the Project Gallery Images section. Click the red "X" on the cloned images to remove them, then click Add / Upload Images to upload your new project photos.
- Update Project Categories: On the right sidebar, check the correct category for your new project (e.g., Hospitality-healthcare).
- Update Featured Image: Scroll down the right sidebar to the Featured Image section. Click Remove featured image and upload the primary cover photo for your new project.
Step 3: Publish
Once you are happy with the text and the new images, click the blue Publish button on the top right. Your new project will automatically appear on the website's portfolio grids!